Sinus lift surgery can feel unsettling. You want clear answers. You also want to protect your health and your smile. Guided sinus lifts use advanced imaging to place implants with care and accuracy. Yet you still face a choice. You may hear two terms from your dentist. Crestal approach. Lateral approach. Each path opens space in your upper jaw for secure implants. Each path carries different steps, healing times, and risks. Your medical history and bone height matter. Your comfort and long-term goals matter. This guide explains how each method works, when each is used, and what you can expect before and after surgery. You will also see how guided planning supports complex care, such as prosthodontics in North Scottsdale. With clear facts, you can ask sharper questions, plan with your care team, and move forward with more control and less fear.
What a guided sinus lift really means
A sinus lift adds bone between your upper teeth and your sinus. The goal is simple. Create a safe room for dental implants when the bone is thin or missing.
In a guided sinus lift, your team uses 3D scans and a custom guide. The guide sits on your teeth or gums. It shows the exact spot and depth for your surgeon. This reduces guesswork. It protects the sinus and nearby nerves.
Guided planning often uses cone beam CT scans. You can see an example of this imaging on the U.S. Food and Drug Administration CBCT page. These scans show bone height, sinus shape, and any hidden issues. Your dentist and surgeon can plan each step on a screen before they touch your mouth.
Crestal vs lateral sinus lift at a glance
Both methods reach the same target. They use different paths.
| Feature | Crestal sinus lift | Lateral sinus lift
|
|---|---|---|
| Where the surgeon enters | Through the top of the tooth socket | Through a small window in the side of the upper jaw |
| Bone height usually needed | Moderate bone present | Little bone present |
| Surgical opening size | Small | Larger |
| Time in the chair | Often shorter | Often longer |
| Common use | Single teeth or small gaps | Larger gaps or severe bone loss |
| Implant placement | Often same visit | Often delayed to a later visit |
| Swelling and soreness | Often milder | Often stronger |
How the crestal guided sinus lift works
In a crestal approach, the surgeon works from inside the socket where the implant will sit. The guide helps set the angle and depth. Small tools slowly raise the sinus floor and lift the thin membrane. Bone graft material then fills the new space.
This method often fits when you still have a fair amount of bone. The guide lets the surgeon stop at a safe height. This helps protect the membrane and sinus. Many people receive the implant at the same visit. That can cut down on extra surgery and recovery.
You may feel pressure but not sharp pain during the visit. Afterward, you may feel some swelling, sinus pressure, and mild bleeding. Clear rules on blowing your nose and sneezing protect the graft.
How the lateral guided sinus lift works
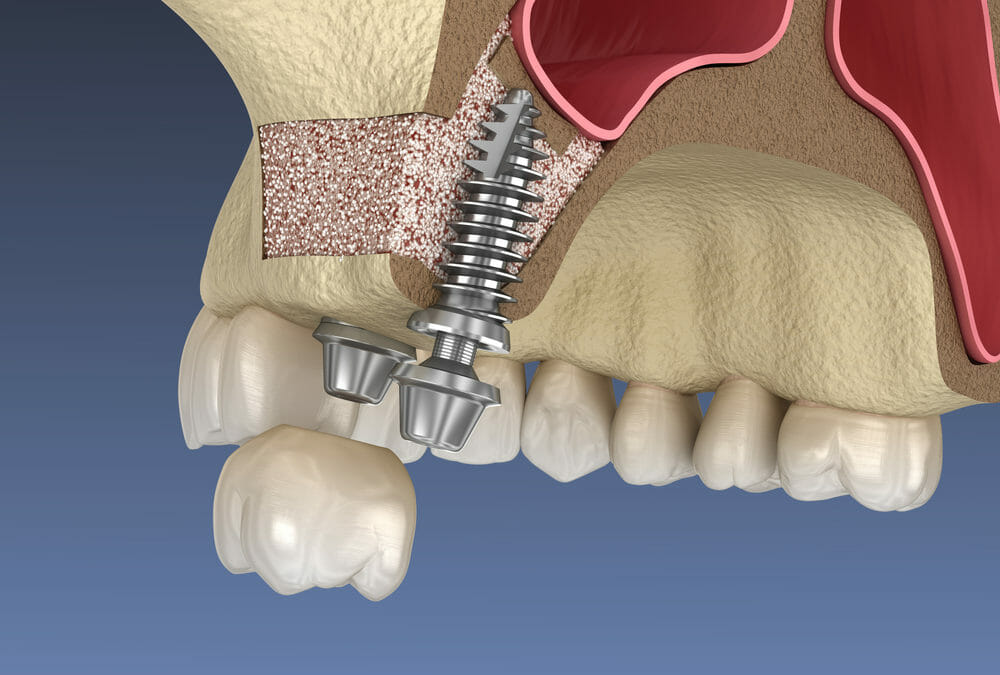
In a lateral approach, the surgeon reaches the sinus from the side of the upper jaw. The guide and 3D scan show the safest window shape and location. The surgeon lifts a small piece of bone on the side. The sinus membrane rises. Bone graft fills the space under it.
This method often fits when bothe ne is very thin. It gives the surgeon a clear view. That view helps when the sinus floor is uneven or there are bone walls or septa. The tradeoff is a larger opening and more healing time.
Implants may need to wait. Your bones grow strong enough to hold them. That timeline can feel long. It still protects you from loose or failing implants later.
Why guided planning matters for both methods
Guided planning supports safer surgery. It also supports stronger long-term results. With a guide, your surgeon can
- Avoid thin spots in bone
- Stay away from sinus walls and nerves
- Place the implant in the best spot for chewing
Good planning also helps your general health. You can review your medicines, sinus history, and smoking history. You can plan around allergies and past surgeries.
Choosing between crestal and lateral approaches
You and your care team decide together. Three main questions guide that choice.
- How much bone do you have now
- How many teeth need implants
- How much treatment time can you accept
If you have enough bone for some support, a crestal lift may work. If the bone is very thin, a lateral lift may be safer. If you want fewer visits, a crestal lift with same-day implants may fit. If you can wait for stronger bones, a staged lateral lift may give more security.
What to expect before and after surgery
Before surgery you can expect
- 3D scans and mouth impressions
- A full review of medicines and health issues
- Clear instructions about food, drink, and rides home
After surgery you can expect
- Swelling that peaks in two or three days
- Bruising on the cheek
- Instructions about ice, pain control, and sleep position
- Rules about nose blowing, sneezing, and straws
Follow-up visits confirm healing and watch for infection or sinus trouble. Call your dentist if you feel sharp pain, drainage with a bad taste, or trouble breathing through your nose on one side.
Using this knowledge to protect your health
Sinus lifts support secure implants. Secure implants protect chewing, speech, and face shape. When you understand crestal and lateral options, you step into your role as an informed partner.
Ask your surgeon to show you your 3D scans. Ask why one method fits you more than the other. Ask how guided tools will protect your sinus. With simple facts and direct questions, you can face surgery with more calm and more control.